Setup a Selenium WebDriver Ruby project on Travis CI
Travis CI is a hosted, distributed continous intergration service for building GitHub projects. It is free of charge for open source GitHub projects in various languages, including C, C++, Java, JavaScript, Python, Ruby and few more1.
This article will demonstrate how to setup an automated UI testing project using Selenium WebDriver Ruby binding with headless Chrome browser (as PhantomJS has been deprecated as of 2017).
- Create a GitHub repository
- Create a Selenium WebDriver Ruby project
- Push to Github
- Login to Travis CI and enable hook
- Run project on Travis CI
- Analyze results on Travis CI
Create a GitHub repository
A public GitHub repository is needed in order to be built on Travis CI for free. New open-source projects can be created at GitHub's 'Create a New Repository' page.
Create a Selenium WebDriver Ruby project
Project Structure
There are no requirements for how Selenium WebDriver Ruby project should be set up. Hence here is how this sample Selenium Ruby project is structured:
/root                       -- root of the repository
    /test                   -- folder contains the sample test
        test_home_page.rb   -- sample test file
    .travis.yml             -- configuration file for Travis CI
    README.md               -- description of the project
    Rakefile                -- Rakefile
Create a UI test
Test::Unitframework is used as the testing framework in this example.- Headless Chrome browser will be the browser to run the UI tests.
- Travis CI supports tests which require GUI, where some setup for
xvfbare needed2.
Here is a sample test file called test_home_page.rb:
require 'selenium-webdriver'
require 'test/unit'

module Test
  class TestHomePage < Test::Unit::TestCase

    def setup
      options = Selenium::WebDriver::Chrome::Options.new
      options.add_argument('--headless')
      @driver = Selenium::WebDriver.for :chrome, options: options
      @driver.navigate.to('http://yizeng.me')
    end

    def teardown
      @driver.quit
    end

    def test_home_page_title
      assert_equal('Yi Zeng', @driver.title)
    end
  end
end
Add Rakefile
Travis CI uses Rakefile to build project and execute the tests, if it is not present, build will fail like this:
$ rake
rake aborted!
No Rakefile found (looking for: rakefile, Rakefile, rakefile.rb, Rakefile.rb)
The command "rake" exited with 1.
Therefore here comes the sample Rakefile:
require 'rake/testtask'

task :default => [:test]
Rake::TestTask.new(:test) do |test|
  test.libs << 'test'

  # ensure the sample test file is included here
  test.test_files = FileList['test/test_*.rb']

  test.verbose = true
end
Add .travis.yml
Travis CI uses .travis.yml file in the root of the repository to learn about the project, which for instance includes:
- Programming language of the project
- Build setup and cleanup
- Commands to execute the build
The sample testing project here is written in Ruby, so Ruby configurations will be used in .travis.yml. Detailed official documentation for building Ruby projects can be found here. In order to validate it, Travis Lint would be a handy tool, while the simplest way is just to go to Travis WebLint and paste the content in.
# Sample .travis.yml file:
language: ruby

rvm: # the Ruby versions to be used
  - 2.1.0
  - 2.0.0
  - 1.9.3

before_install:
  - gem install selenium-webdriver
Push to Github
Once the repository is properly created, push it to Github.
Login to Travis CI and enable hook
- Login to Travis CI with the GitHub account of this repository.
- Visit Travis CI profile and find the repository. If the repository does not appear on the list, make sure
- It is not a private repository
- Travis CI has been synced with GitHub (click "Sync now" if necessary)
- Enable the hook for this repository.
Run project on Travis CI
Travis CI should be able to build to the project automatically whenever new changesets are pushed to GitHub. However, to kick off a test run manually:
- From Travis CI project page
- Find this project's page on Travis CI
- Click the refresh icon
- From GitHub project settings
- Go to project's settings page on GitHub
- Select tab
Webhooks & Services(url: https://github.com/[GITHUB_USERNAME]/[REPO_NAME]/settings/hooks)- Click 'Configure services' button
- Find
Travisdown to bottom- Click
Test Hookbutton
Analyze results on Travis CI
Project page
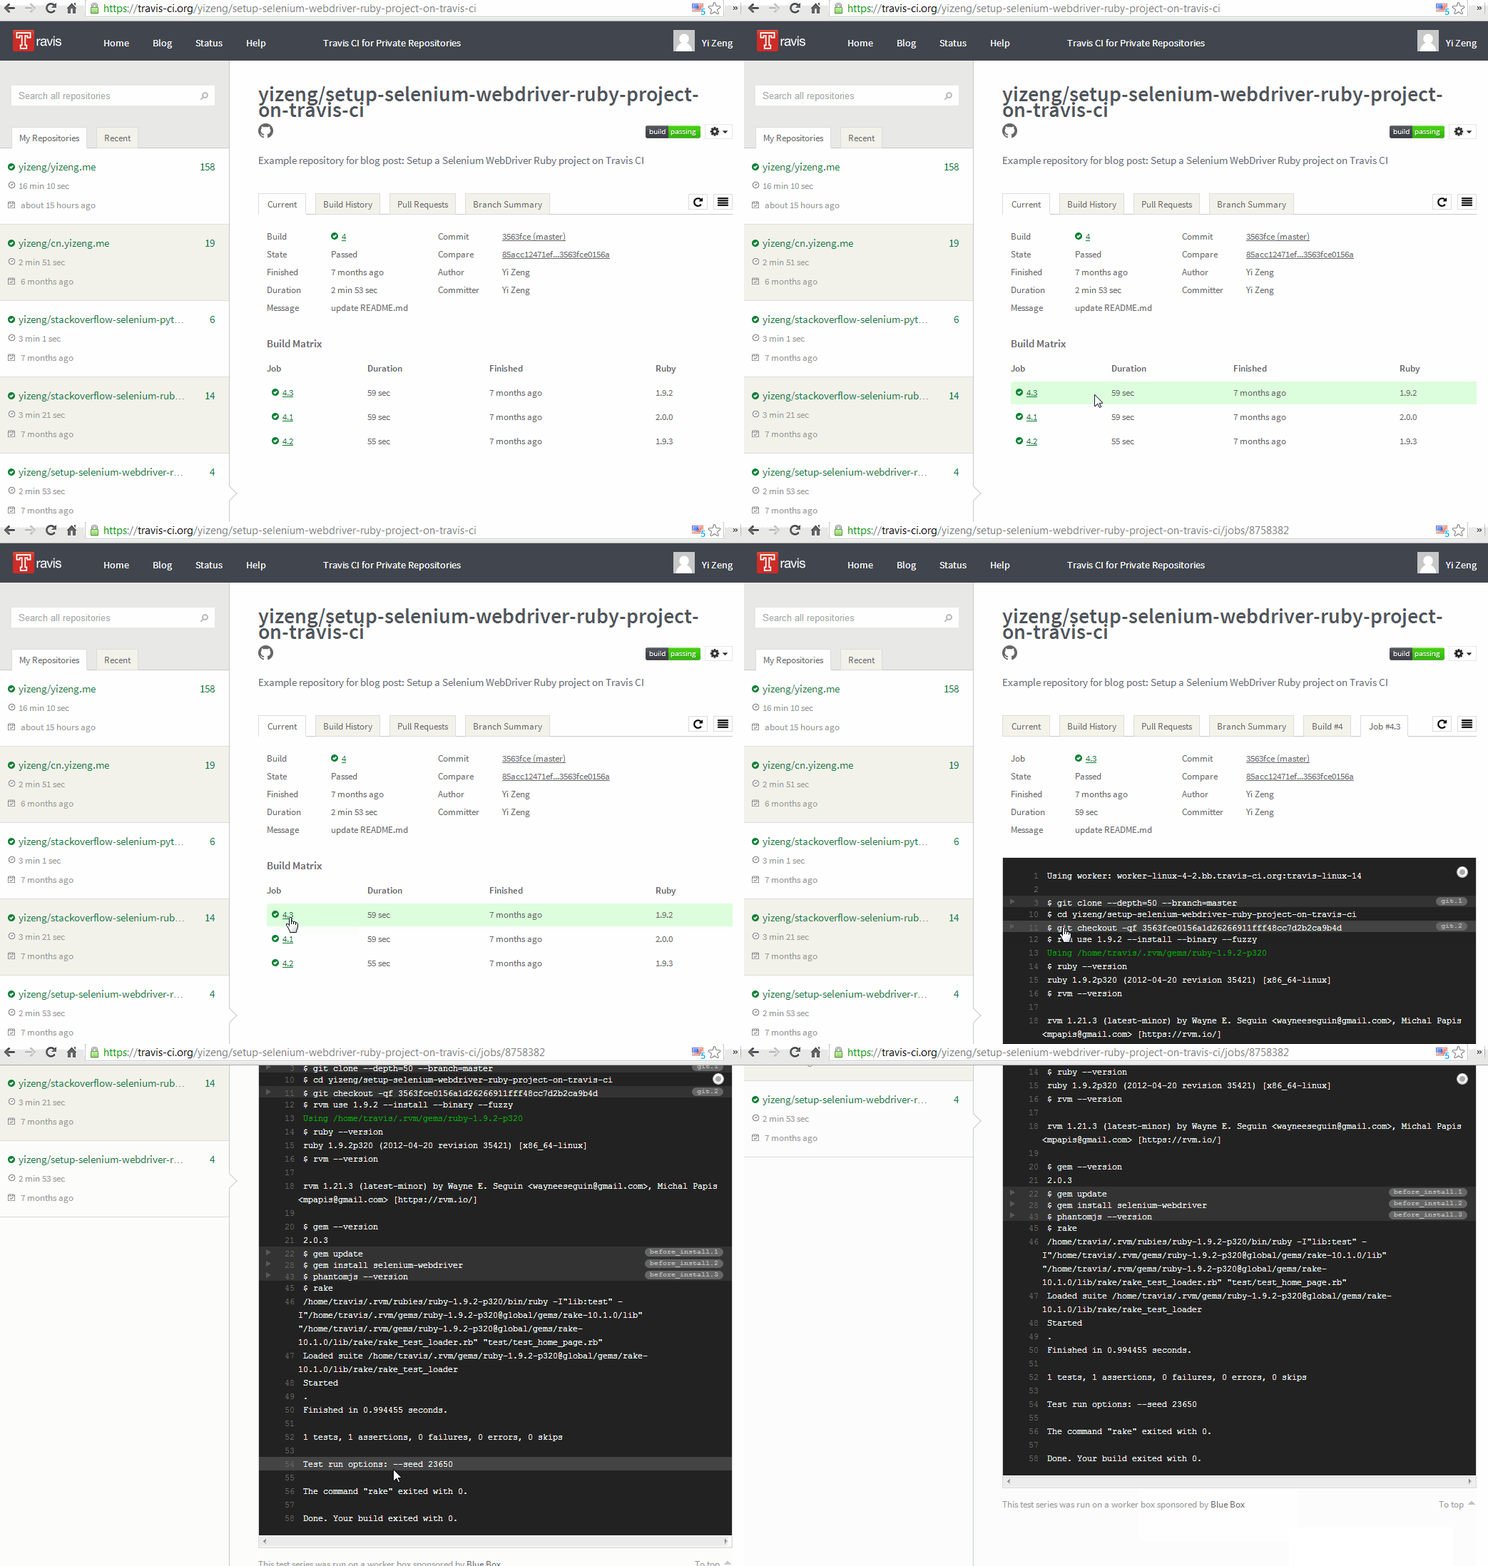
The project page on Travis CI is: https://travis-ci.org/[GITHUB_USERNAME]/[REPO_NAME]
Build log
Clicking each job number will open up the build log for that particular job, which contains all console output produced during the build.
Test Results
Test results are shown in the rake section of the build log. For example, here are the test results inside this particular job's build log:
$ rake
/home/travis/.rvm/rubies/ruby-2.0.0-p0/bin/ruby -I"lib:test" -I"/home/travis/.rvm/gems/ruby-2.0.0-p0/gems/rake-10.0.4/lib" "/home/travis/.rvm/gems/ruby-2.0.0-p0/gems/rake-10.0.4/lib/rake/rake_test_loader.rb" "test/test_home_page.rb"
Run options:

# Running tests:

Finished tests in 1.078374s, 0.9273 tests/s, 0.9273 assertions/s.
1 tests, 1 assertions, 0 failures, 0 errors, 0 skips

ruby -v: ruby 2.0.0p0 (2013-02-24 revision 39474) [x86_64-linux]
The command "rake" exited with 0.
Build status images
Travis CI provides build status images for projects, which are encouraged to be added to project sites or README files as good software development practices.
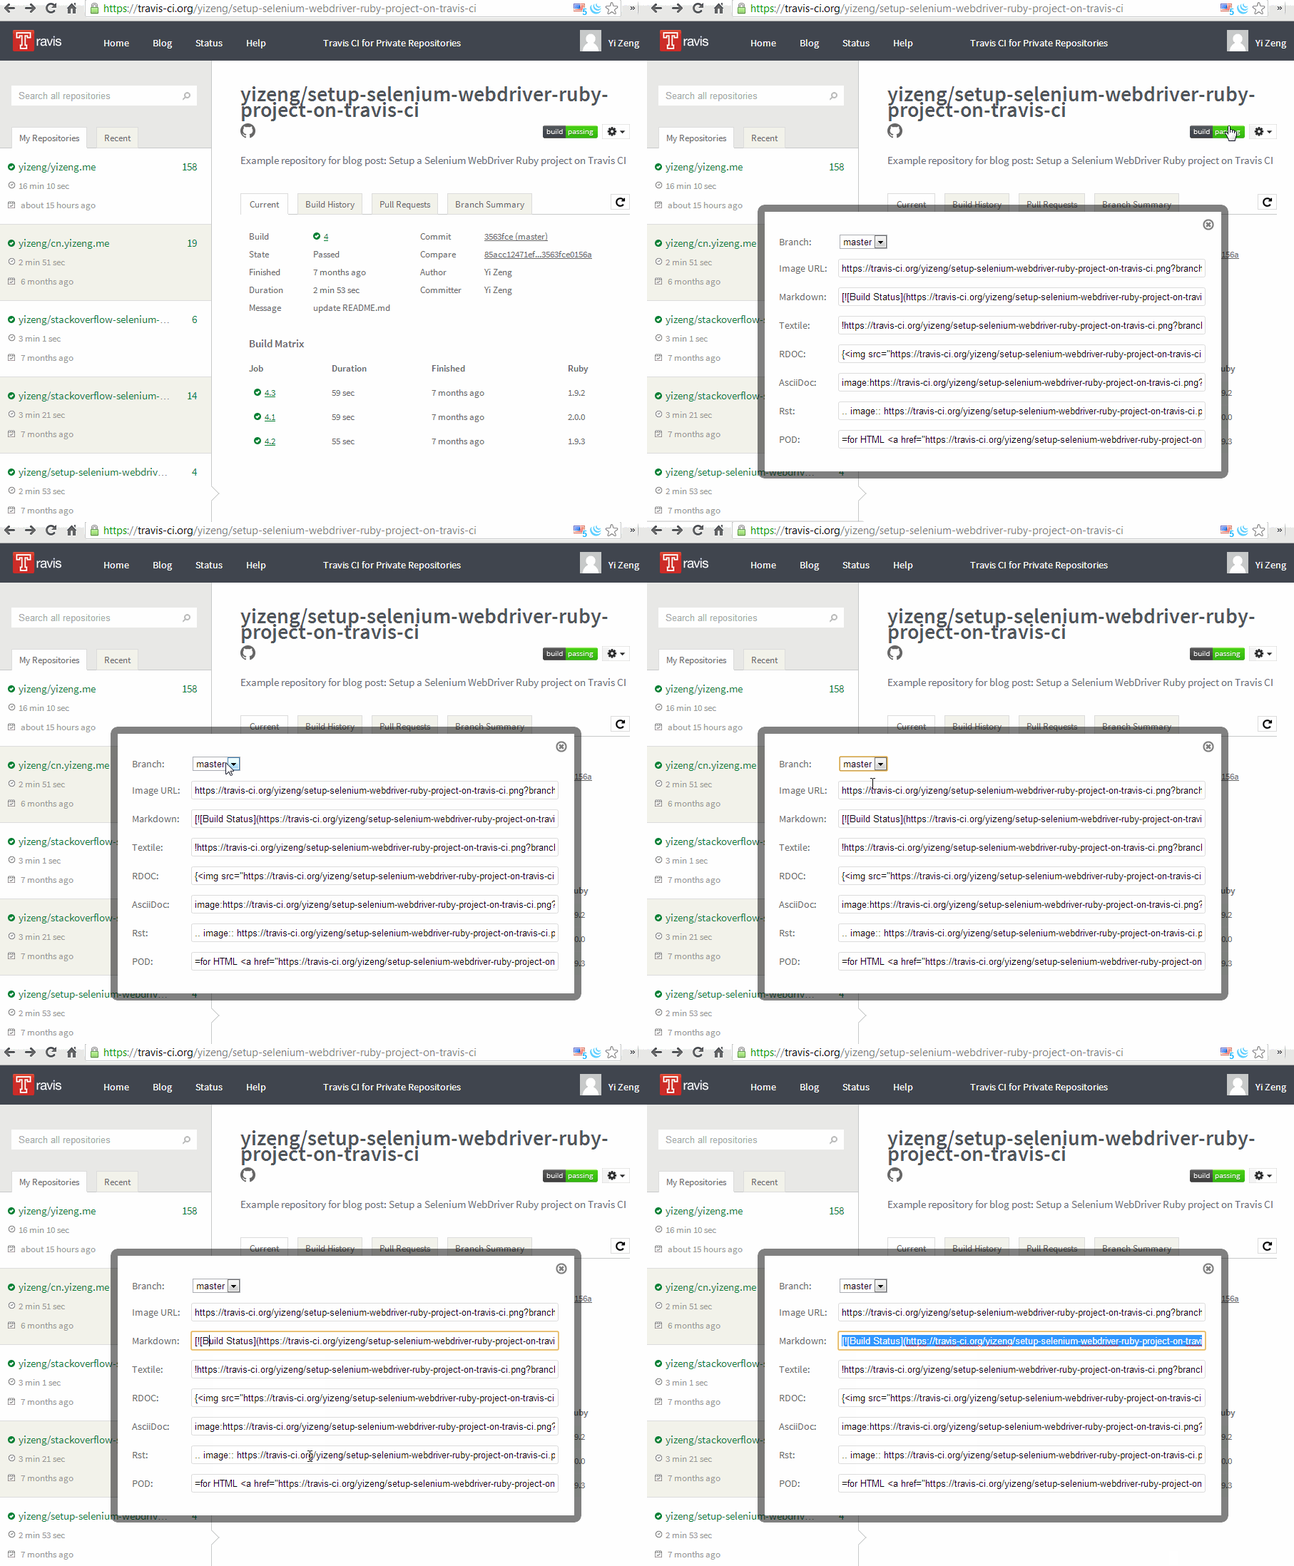
The status image can be found at https://travis-ci.org/[GITHUB_USERNAME]/[REPO_NAME].png, with branches can be specified by URL query string like ?branch=master,staging,production optionally.
Alternatively, in the repository page of Travis CI, click settings icon button, then select Status Image, a dialog with all the options will be displayed, as shown in the screenshot below:


